Adding Printers
Add the printers to Epson DC Agent for ECSP.
-
Connect the printer to be added in Epson DC Agent for ECSP to the network. USB connections are not supported.
-
Set a static address so that the printer IP address does not change. If the IP address changes due to automatic allocation, printer information is not collected.
-
Do not add the same printer to more than one Epson DC Agent for ECSP. Otherwise, printer information may not be acquired correctly.
-
Check the printer's time setting. With Epson DC Agent for ECSP, you can set the current time on your computer when you add the printer.
-
Click the start button on Windows, and then select Epson Software > Epson DC Agent for ECSP to run Epson DC Agent for ECSP.
-
Follow the on-screen instructions to setup.
-
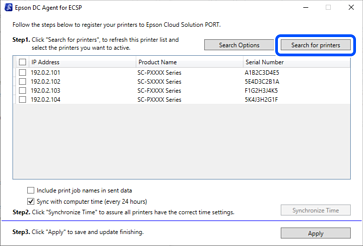
Click Search for printers on the Epson DC Agent for ECSP screen.
When printers are found, they are displayed as a list.
 Note:
Note:If the printer is not displayed, specify the IP address.
1. Click Search Options, and then enter the IP address of the printer on the search conditions screen.
2. Click OK to close the search conditions screen, and then start the printer search.
-
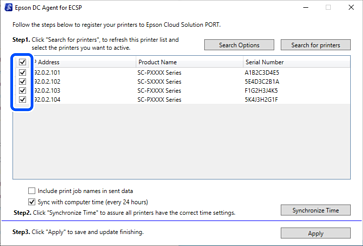
Select the printers you want to add.
Note:You can select or clear all with the check box at the top.
-
Make sure Include print job names in sent data is selected.
Select this to send job names. Clear this if you do not want to include job names in the sent data.
-
Make sure Sync with computer time (every 24 hours) is selected.
Select this to automatically set the time on the selected printers every 24 hours.
When this is cleared, Synchronize Time is enabled. You can set the current time for the selected printers.
-
Click Apply.
A confirmation screen for applying the settings is displayed.
-
Click OK.
The printers are added to Epson DC Agent for ECSP.
Printer information that is added here is sent to the Epson server, and the printer is added to My Devices > Printers in Epson Cloud Solution PORT.
-
Click OK on the confirmation screen.
Note:If you want to check the printer's registration status, click the URL on this screen.