Allocating Print Jobs to Printers
You can allocate print jobs uploaded using Epson Edge Print to the destination printer.
-
Log in to Epson Cloud Solution PORT, and then select Production Flow on the Home screen.
-
Select
 (Settings) > Job Allocation Settings on the Work Order Management screen, and then set Job Allocation Settings > Job Allocation to Enable.
Note:
(Settings) > Job Allocation Settings on the Work Order Management screen, and then set Job Allocation Settings > Job Allocation to Enable.
Note:Click Production Flow from the breadcrumbs to return to the Work Order Management screen.
From the next step, perform the operations on the source Epson Edge Print.
-
Create a print job on the source Epson Edge Print, and then open the Job Upload screen.
For Epson Edge Print operations, see the Epson Edge Print help.
-
Set each item, and then click OK.
See the following for details on each item.
 Details of the Job Upload Screen
From the next step, perform the operations on Production Flow.
-
Click Job Allocation on the Work Order Management screen.
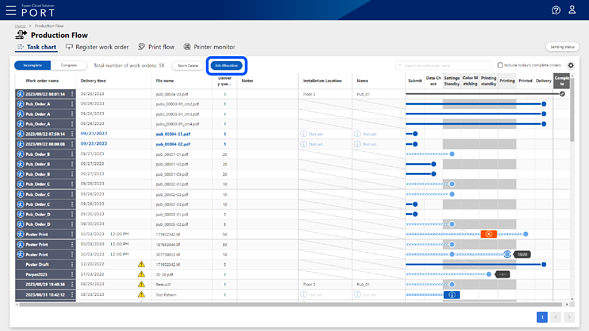
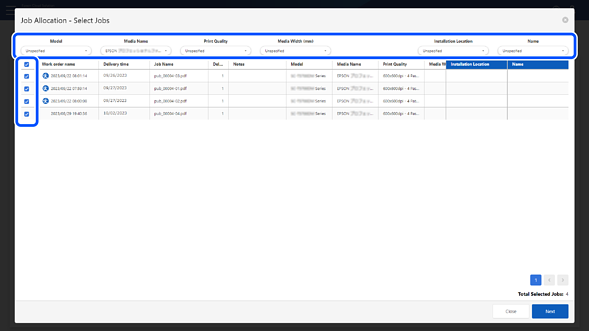
The Job Allocation - Select Jobs screen is displayed.
-
Use the item filter to narrow down the print jobs, and then select the print jobs you want to allocate to the printer.
Note:-
If multiple item filters are specified, print jobs that match all of them are displayed.
-
If you select one or more print jobs, a checkbox is displayed in the item name line. Click to batch select or clear all print jobs of the same model as the selected print job.
-
-
Click Next.
The Job Allocation - Select Printer screen is displayed.
-
Select the printer to which you want to allocate the print jobs, and then click OK.
The print jobs are allocated to the printer, and the selected printer and installation location are displayed in the Printer Name and Printer Location columns on the Work Order Management screen.