Batch Printing Multiple Print Files in a Work Order
You can print multiple print files in a work order at once with the same print settings.
You can specify only one printer for batch printing.
-
Click Work Order Management to display the Work Order Management screen.
-
Select
 (Settings) > Job Allocation Settings, and then set Job Allocation Settings > Job Allocation to Disable.
Note:
(Settings) > Job Allocation Settings, and then set Job Allocation Settings > Job Allocation to Disable.
Note:Click Production Flow from the breadcrumbs to return to the Work Order Management screen.
-
Click Print Queue to display the Print Queue screen.
-
Click Batch print on the line of the work order that contains the print files you want to print.
Note:To display the print file information on the Print Queue screen, the task on the Work Order Management screen must have advanced to Awaiting Settings.

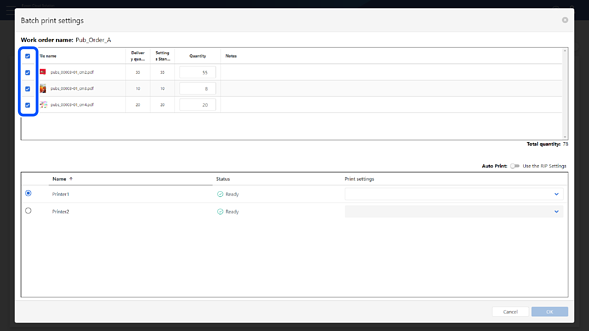
The print files in the work order are listed on the Batch print settings screen.
-
Select the print files you want to batch print.
All print files are selected by default.
-
Change the number of copies to be printed if necessary.

-
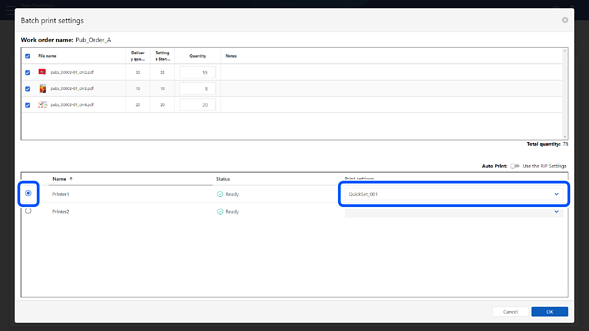
Select the printer you want to use for printing, and then select the print settings from Print settings.
Note:The print settings are the names of Quick Sets (for Epson Edge Print), presets (for Epson Print Automate) and hot folders (for other digital front ends) registered to Epson Cloud Solution PORT using Epson PJ Agent for ECSP.
-
Click OK.
The Check printed content screen is displayed.
-
Check the displayed contents, and then click Print.
The destination printer is instructed to start printing.
The Printing standby column displays the number of copies that you have instructed to print and the status of the task. See the following for details about the status displayed in the Printing standby column.

-
You can check the progress of the entire process for each print file on the Work Order Management screen.
-
You can check the information for each printer on the Printer monitor screen.