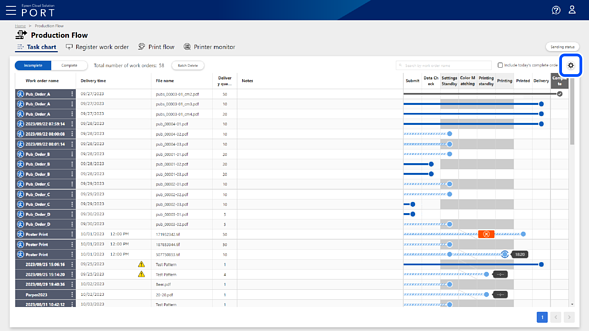
Configuring the Task Chart
You can register and edit tasks before and after the printing process to configure the task chart.
-
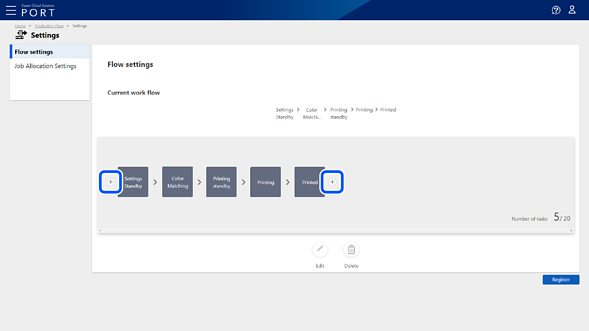
Click
 (Settings button).
-
Select Workflow Settings from menu on the left.
The Workflow Settings screen is displayed.
-
Click
 where you want to insert a task.
Note:
where you want to insert a task.
Note:The printing process (Awaiting Settings, Color Matching, Printing standby, Printing, and Printed) is fixed and cannot be edited.
-
Enter the task name on the Task name settings screen, and then click OK.
The task is added.
-
Add any additional tasks you want to complete the task chart.
-
Click Save Settings.
Note:-
To edit the task name, select the task, and then click Edit.
-
To delete a task, select the task, and then click Delete.
-
To return to the Work Order Management screen without registering, click Production Flow from the breadcrumbs.
-