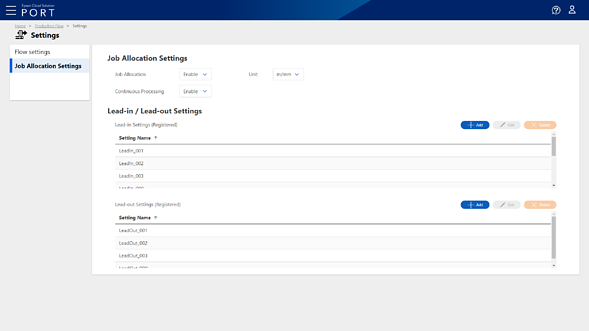
Details of the Job Allocation Settings Screen
This is displayed when you click  (Settings) on the Work Order Management screen, and then select Job Allocation Settings from the menu on the left. Note that the (Settings) button is displayed when In-progress is selected for the work order display switching button on the Work Order Management screen.
You can configure the allocation function for print jobs uploaded using Epson Edge Print.
Click Production Flow from the breadcrumbs to return to the Work Order Management screen.
|
Item |
Description |
|---|---|
|
Job Allocation |
Sets whether or not to enable the allocation function for print jobs uploaded using Epson Edge Print. When this is enabled, you can set how print jobs are allocated.
|
|
Unit |
Sets the units for width and length used in the print job allocation settings. |
|
Continuous Processing |
Sets whether or not to enable the Continuous Processing function for the Label Press. |
|
Item |
Description |
|
|---|---|---|
|
Lead-in Settings (Registered) |
Displays a list of Lead-in settings. |
|
|
Setting Name |
Displays the Lead-in setting name. |
|
|
Add |
Click to display the Register Lead-in Settings screen.
|
|
|
Edit |
Click to display the Edit Lead-in Settings screen.
|
|
|
Delete |
Click to display the confirmation screen. You can also delete the Lead-in settings. |
|
|
Lead-out Settings (Registered) |
Displays a list of Lead-out settings. |
|
|
Setting Name |
Displays Lead-out setting name. |
|
|
Add |
Click to display the Register Lead-out Settings screen.
|
|
|
Edit |
Click to display the Edit Lead-out Settings screen.
|
|
|
Delete |
Click to display the confirmation screen. You can also delete the Lead-out settings. |
|
